"Mastering the Art of Applying Copper Vinyl Wraps Like a Pro"
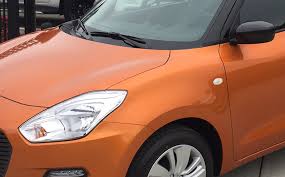
Copper Vinyl Wraps have become a popular choice among car enthusiasts for their sleek, modern, and eye-catching appeal. Whether you're looking to give your vehicle a unique aesthetic or simply want to protect its original paint, applying a copper vinyl wrap can be a rewarding project. However, achieving professional results requires the right tools, techniques, and a bit of patience. In this article, we’ll walk you through the steps to apply copper vinyl wraps like a pro.
Step 1: Gather Your Tools and Materials
Before you begin, make sure you have the following:
- High-quality copper vinyl wrap
- Squeegee or application tool
- Heat gun or hair dryer
- Utility knife or precision blade
- Cleaning solution and microfiber cloth
- Masking tape
- Gloves (optional)
Investing in premium materials and tools will ensure a smoother application and long-lasting results.
Step 2: Prepare Your Surface
Proper preparation is key to a flawless finish. Start by thoroughly washing your car to remove dirt, grease, and debris. Once clean, use a microfiber cloth and an alcohol-based cleaning solution to wipe down the surface, ensuring it’s free of any residue. For best results, work in a clean, dust-free environment with moderate temperature.
Step 3: Measure and Cut the Vinyl
Unroll the copper vinyl wrap and measure it against the section of the car you plan to cover. Add a few extra inches on all sides to allow for adjustments during application. Use a utility knife to cut the vinyl to size.
Step 4: Apply the Vinyl
Peel off the backing of the vinyl wrap and carefully position it on the surface. Use your squeegee to press the vinyl down, starting from the center and working outward to eliminate air bubbles. Apply firm, even pressure to ensure the wrap adheres smoothly.
For curved or uneven areas, gently heat the vinyl with a heat gun to make it more pliable. This will allow you to stretch and mold it into place without creases or wrinkles.
Step 5: Trim Excess Vinyl
Once the vinyl is securely applied, use a sharp utility knife to trim away any excess material. Be precise and take your time to avoid cutting into the car's paint.
Step 6: Seal the Edges
To prevent peeling or lifting over time, use your squeegee and heat gun to firmly seal the edges of the vinyl. Pay extra attention to corners and seams for a clean, professional finish.
Step 7: Inspect and Adjust
Finally, inspect your work for any imperfections. If you spot air bubbles or wrinkles, use your squeegee and heat gun to smooth them out. Take pride in your craftsmanship—attention to detail makes all the difference.(3M Vehicle Wraps)
Conclusion
Applying a copper vinyl wrap may seem daunting at first, but with the right approach, you can achieve professional-grade results. By following these steps and practicing patience, you’ll transform your vehicle into a stunning masterpiece that turns heads wherever you go. Ready to get started? Visit "www.vinylcarwrapshop.com" for premium copper vinyl wraps and all the tools you need to bring your vision to life!